Free Printable: Measurement Clip Cards for Kids
Are you searching for an engaging and educational activity to introduce your child to measurement? Look no further! Our Montessori-inspired measurement clip cards are designed to make learning about measurement fun, interactive, and hands-on.
For the past few years, Eric and I have been busy fixing up our former home — a small 1920’s Craftsman-style home that was in desperate need of some serious updates and repairs — and now, since moving to a new home late last year, we have begun to learn more about woodworking because, let’s face it, basic, builder-grade homes can be pretty boring and we wanted to add our own special touches. [You can find a few of our more recent DIY home projects here and here.]
Since children are naturally attracted to what they observe in their surrounding environment, it’s no surprise that Lilly’s had an interest in building for quite some time. She has a small box of tools along with access to scrap wood, and she loves to go out into our garage and work alongside us whenever possible.
Measurement Clip Cards
DISCLOSURE: THIS POST CONTAINS AFFILIATE LINKS AT NO COST TO YOU. THIS MEANS I MAY RECEIVE A SMALL COMMISSION IF YOU MAKE A PURCHASE USING THESE LINKS.
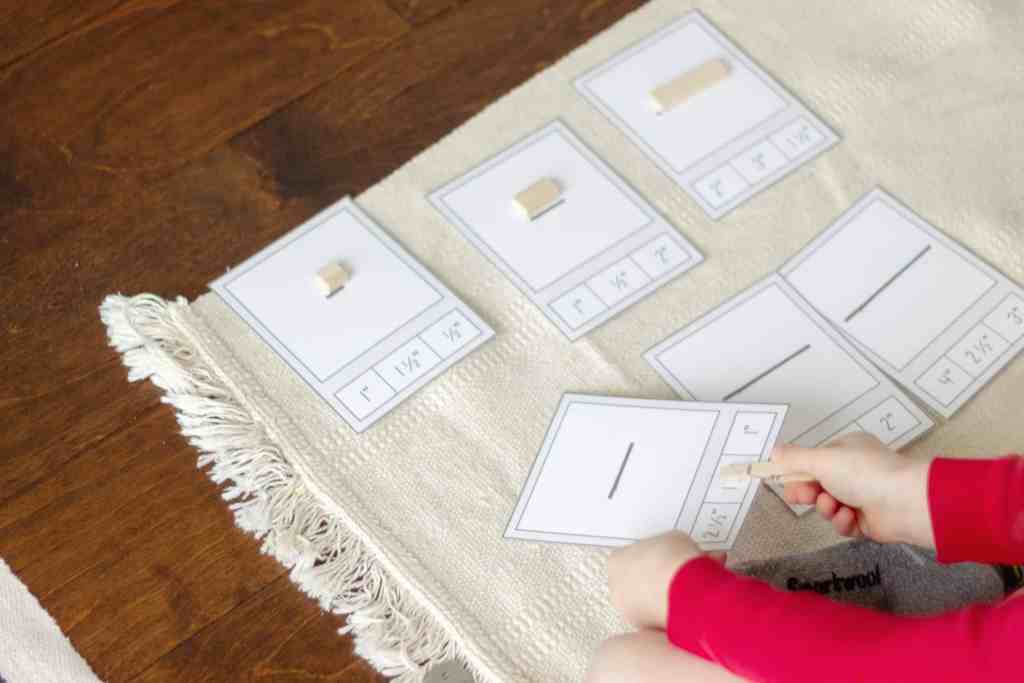
I recently created some measurement clip cards for her to use in the schoolroom since measuring is one of her favorite things to do when she helps us with our projects around the house. The cards focus on measuring inches, half-inches, and quarter-inches. Once she’s proficient with recognizing these measurements, I plan to create another set of cards for centimeters.

The concept is really simple:
how to use
- Print the measurement clip cards.
- Mark the control of error on the back side of the card so they become a self-correcting exercise.
- [OPTIONAL] Laminate the cards.
- Depending upon your child’s age and familiarity with both numbers and measurements, follow this guideline:
- For the first presentation, simply present the (3) cards measuring inches along with a clothespin and a ruler.
- For the second presentation, include both the (3) cards measuring inches and the (3) cards measuring half-inches along with a clothespin and ruler.
- For the third presentation, include the (6) cards measuring quarter-inches along with a clothespin and ruler.
- For the fourth presentation, include all (12) cards together.
- Demonstrate to the child how to use the ruler to measure the stick, find the correct measurement listed on the card, and use the clothespin to clip the answer. Then simply turn the card over to confirm the measurement is accurate.
That’s it! As your child becomes proficient with each measurement, simply add in another set of cards and introduce the next concept.
If you would like to extend the card activity, cut a stick or wooden dowel to the measurements included on the cards (¼”, ½”, ¾”, 1″, 1 ¼”, 1 ½”, 1 ¾”, 2″, 2 ¼”, 2 ½”, 2 ¾”, 3″). Now your child can easily match the objects to the cards and tangibly feel the difference between, say, the stick measuring ½” inch and the one measuring 3″ inches.
For additional fun, go on a scavenger hunt throughout your home or outside looking for items with matching measurements. For example, “Let’s see if we can find something that is 1″ long. Now let’s see if we can find something that is 2.5″ long.” Feel free to add in longer measurements as well since the basic concept of measurement has already been introduced: “Can you bring me something that is 7″ inches long? What about 12″ long?” This is also a great way to begin introducing the concepts of length vs. width vs. depth to a child.
We opted to cut a wooden dowel to the matching corresponding sizes to make this measurement activity more hands-on.


Because this activity contains some small objects and my preschooler and toddler share the same schoolroom/playroom, I store everything inside one of these small photo boxes on my older daughter’s shelf. All the materials are neatly contained and easily accessible for my 4-year-old but still toddler-proof.

These measurement clip cards are available for free in the Resource Library. You can download them by subscribing to the newsletter below.
free printable
Measurement Clip Cards
Our Montessori-inspired measurement clip cards are designed to make learning about measurement fun, interactive, and hands-on.
Don’t forget to pin this for later!


